Octave Mandolin
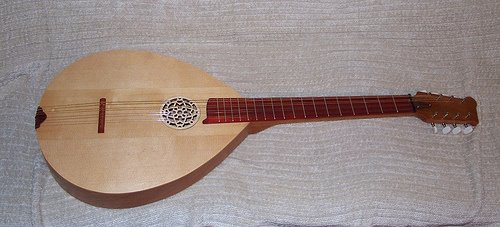
In March 2006 I built an octave mandolin (sometimes called a bouzouki). This was two and a half years after I made my mountain dulcimer and I hadn't built any other instruments since then.
The octave mandolin was a kit from MusicMaker's Kits. Since I was still not sure of my instrument crafting abilities, especially after so much time away from it, I decided that a kit would be at an appropriate skill level for me. The kit included all the parts needed to build the instrument except for glue, finish and a small assortment of tools.
When I started working with the kit I was very happy with the amount of work that was left to do. The sides had been bent, the top and back were cut to shape but oversized, the soundhole was cut in the top and the neck had been roughly shaped and slotted to fit the sides. The rest was up to me and my whim. A much better opportunity to put my own personalization into the instrument than with the mountain dulcimer. I didn't even install binding on the body or inlay on the fretboard -- both would be great opportunities to further personalize the instrument.
The work starts with the headstock - it is oversized and needs to be cut down and given your desired shape. This step also included trimming and rounding the neck. The neck itself still had square edges and that meant it was up to me to pick the thickness and shape of the neck.
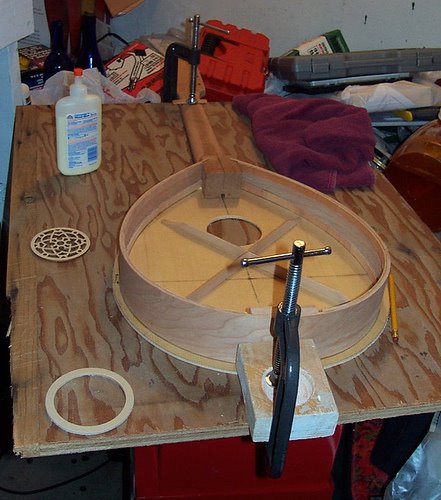 After the neck was finished it was time to attach the sides and start working on constructing the body. This was my favorite part of construction. As I progressed through these steps the reality begins to set in that I was actually building a real musical instrument and I couldn't wait to play it. That's where patience helps. Not so much you leave the parts in a corner to wait months for your return, but just enough that you don't rush any critical steps and allow the glue to dry thoroughly.
With the soundbox together the construction shifts to the parts that require even more attention to detail. Minor oversights in this part will lead to an instrument that looks ok but is almost impossible to play easily (assuming you know how to play such an instrument). Some parts like leveling the frets can be worked out after you've finished the instrument and it is strung up. Others, like gluing the fretboard on straight, don't have as many options for correcting. I should note that the fretboard is slotted but the frets are not installed. A length of fretwire is included in the kit. So you can have the fun of installing frets, but you don't have to worry about measuring fret distances if you use the fretboard included in the kit.
The next step is finishing the instrument, which isn't much different than finishing other woodwork. The exceptions are included in the manual. With the finish complete the non-wood parts can be installed and the instrument can be set-up. Unlike an acoustic guitar the bridge is not glued to the top -- it is only held in place by the tension of the strings. This makes it much easier to adjust the intonation of the strings as you set up the instrument.
I was very satisfied working on this kit. In fact I didn't want the instrument building experience to end so I was scrambling to find what my next project would be. That's one area that I definitely need to build some experience on. Perhaps once I've got a few more instruments done I will be able to keep myself from thinking too much about the next one while I'm still finishing the current piece.
All my photos of the octave mandolin construction.
Tools needed:
- coping saw to help cut the headstock
- sanding block, sandpaper (power sander can help a lot but isn't necessary)
- Clamps - I used several C-clamps, a couple spring clamps and a handful of springy clothespins. Quite a bit could be done using weights.
- hand drill to drill the holes for the tuners
- dremel or router if you want to do the binding -- I didn't apply binding to mine
- wood glue - I used Elmers Wood Glue.
- finishing materials: varnish, tung oil, etc... However you want to finish it. The instructions included with the kit give a few options for the finish
- clean, flat work surface
- patience
posted by James at 4:00 PM
1 comments
![]()
![]()


